
Chapter – 3 :Supply and Demand Zones in Forex Tradings (Institutional order blocks & zones)
Chapter – 3 :Supply and Demand Zones in Forex Tradings (Institutional order blocks & zones)
While traditional Support and Resistance levels (Chapter 2) focus on horizontal price bounces, Supply and Demand Zones look deeper into the underlying footprints left behind by institutional market participants—banks, hedge funds, and market makers. Understanding supply and demand allows retail traders to align their setups with where the “smart money” is actually executing their orders.
1. What Are Supply and Demand Zones?
Institutions trade with massive volume. They cannot enter their full position at a single price without causing massive slippage and ruining their own entry. Instead, they accumulate their positions over time, leaving behind consolidation regions filled with unfilled institutional orders.
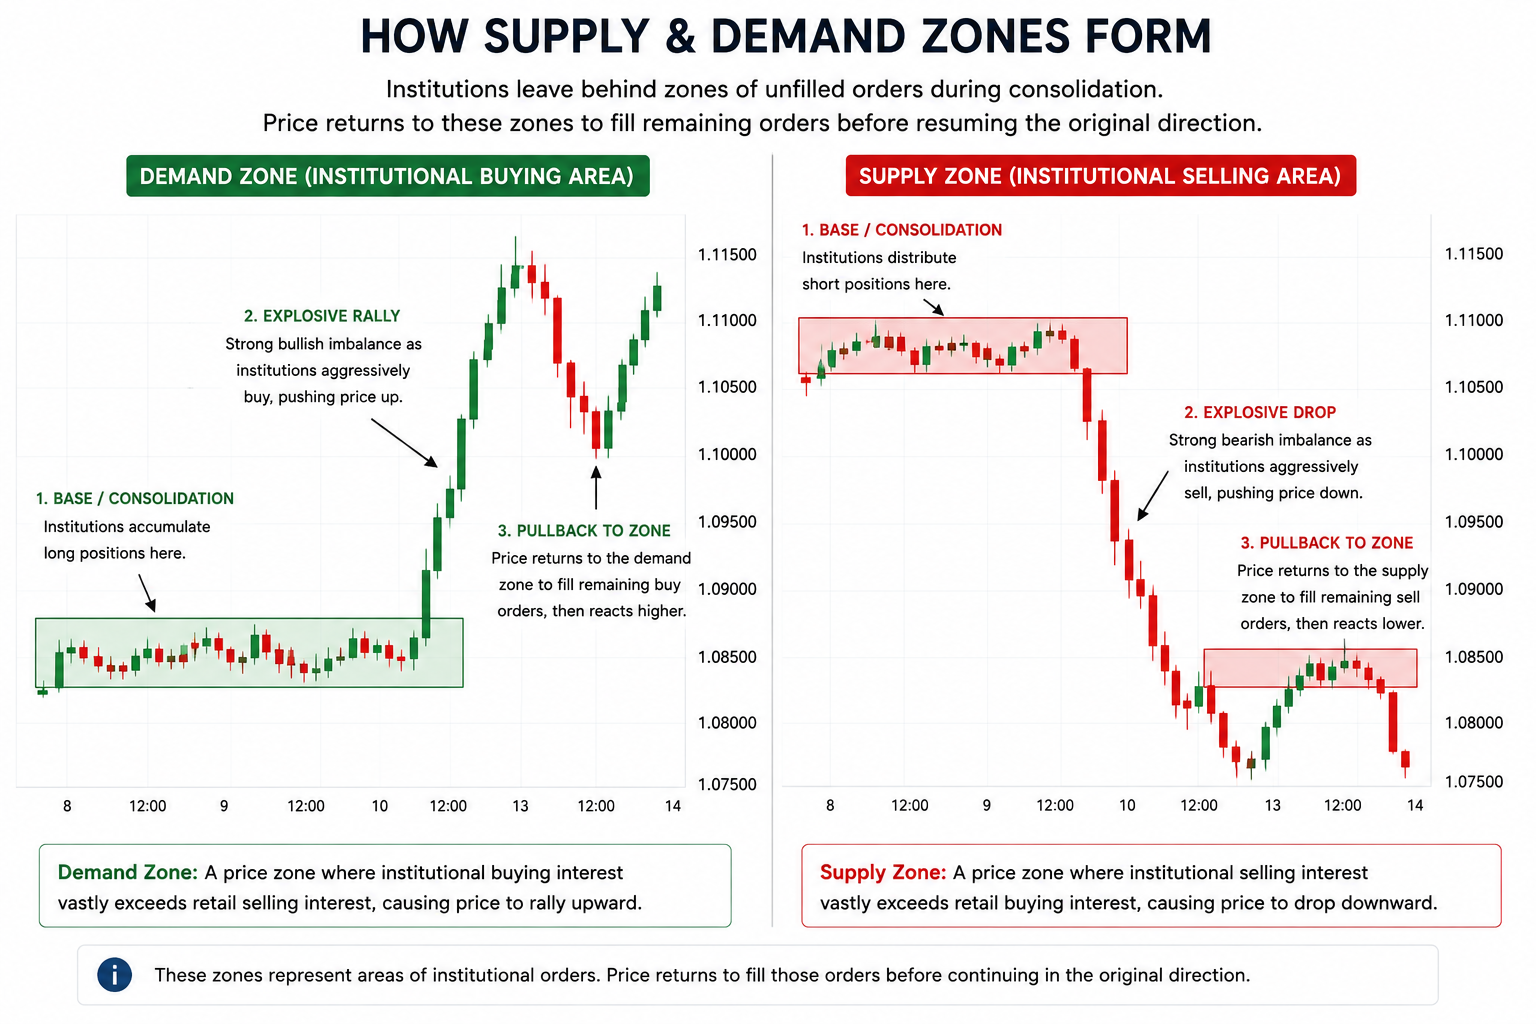
- Demand Zone (Institutional Buying Area): A price zone where institutional buying interest vastly exceeds retail selling interest, causing price to rally upward rapidly.
- Supply Zone (Institutional Selling Area): A price zone where institutional selling interest vastly exceeds retail buying interest, causing price to drop downward rapidly.
2. Supply & Demand vs. Support & Resistance
It is crucial to understand the difference between these two concepts. They may look similar on a chart, but their underlying mechanics are entirely different.
| Feature | Support & Resistance | Supply & Demand Zones |
|---|---|---|
| Visual Look | Thin lines or simple horizontal bands. | Wider rectangular boxes built around base candles. |
| Origin | Created by multiple historical bounces. | Created by a single, explosive imbalance. |
| Re-use / Freshness | Gains strength with more touches. | Loses strength with each touch (orders get filled). |
| Focus | Historical price memory. | Institutional order flow & liquidity. |
3. The 4 Core Supply & Demand Formations
Supply and demand patterns fall into two categories: Reversal Formations and Continuation Formations.
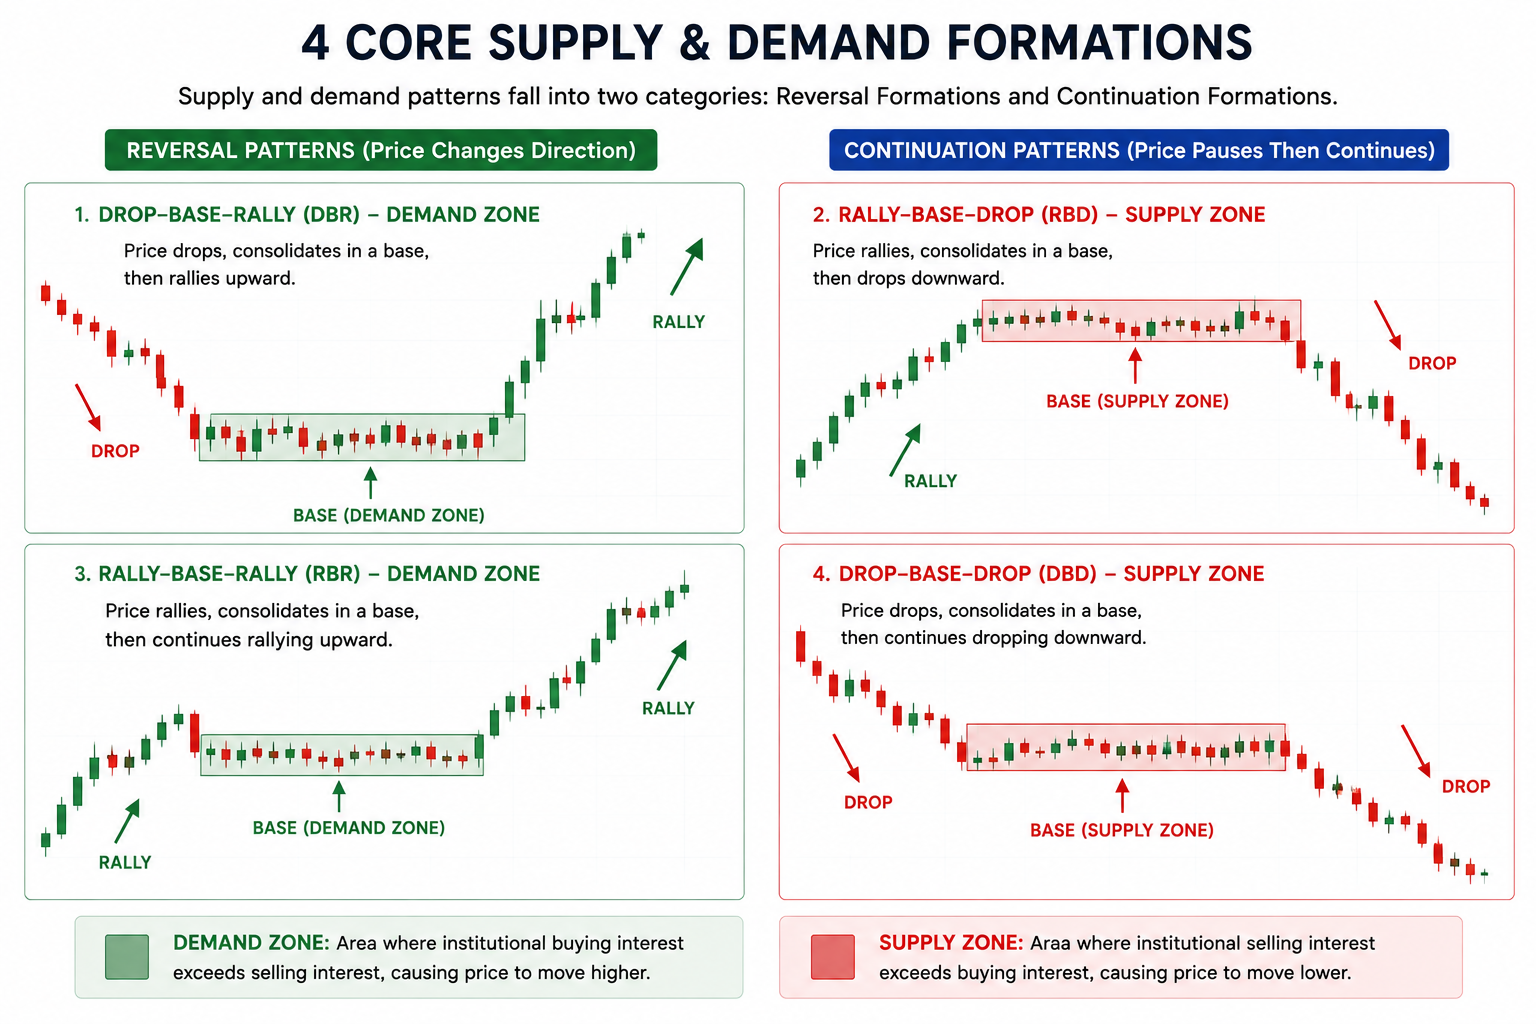
- Drop-Base-Rally (DBR): Demand Zone (Reversal). Price drops, consolidates, then explosively rallies upward.
- Rally-Base-Drop (RBD): Supply Zone (Reversal). Price rallies, consolidates, then explosively drops downward.
- Rally-Base-Rally (RBR): Demand Zone (Continuation). Price rallies, pauses briefly, then continues upward.
- Drop-Base-Drop (DBD): Supply Zone (Continuation). Price drops, pauses briefly, then continues downward.
4. Understanding Institutional Order Blocks
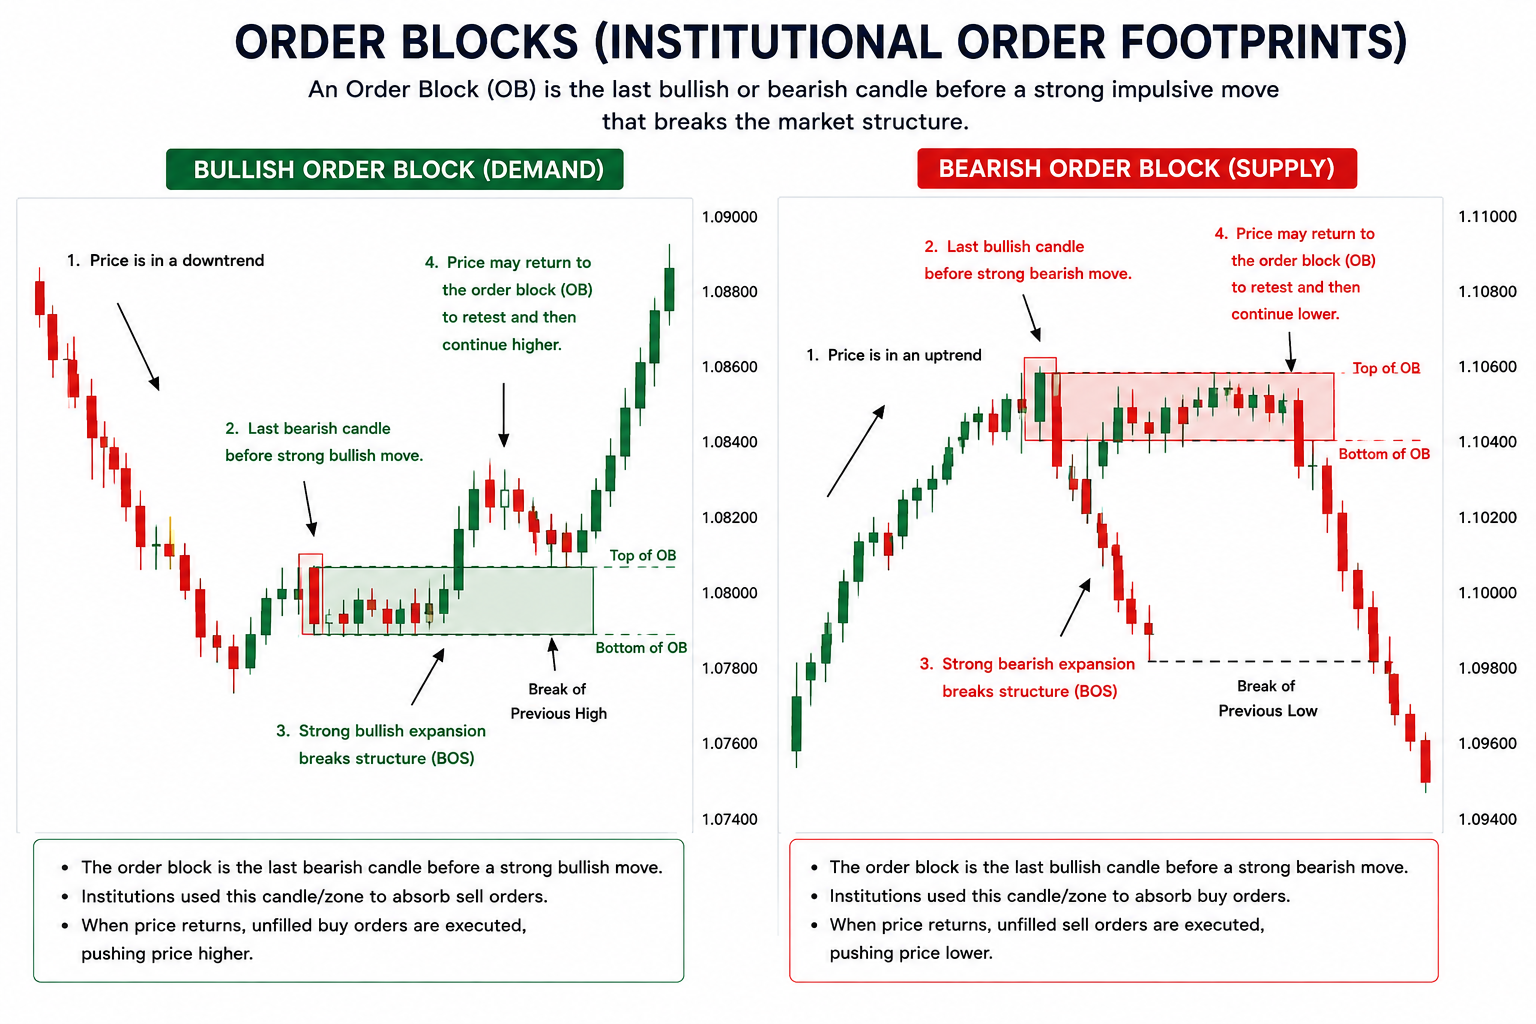
An Order Block (OB) is a specific candlestick within a supply or demand zone where an institution placed its last major orders before a strong directional price expansion.
- Bullish Order Block: The last bearish (red) candle before a strong upward price movement that breaks market structure.
- Bearish Order Block: The last bullish (green) candle before a strong downward price movement that breaks market structure.
5. How to Identify High-Probability Zones
Not every consolidation area creates a valid trading zone. High-probability supply and demand zones share three distinct traits:
1. Explosive Departure (Strong Imbalance)
The price movement away from the zone must be fast and aggressive, creating large body candles or price gaps (Fair Value Gaps).
2. Freshness (Untested Zones)
Fresh zones that have never been retested carry the highest probability. Each time price returns, more unfilled orders are filled, weakening the zone.
3. Break of Structure (BOS)
The strong departure out of the zone must successfully break a previous market high or low, proving institutional dominance.
Summary Key Takeaways
- Follow institutional footprints: Supply and demand zones highlight areas where big banks execute large positions.
- Freshness matters: The most reliable zone is a fresh, untested zone. Avoid trading zones that have already been tested multiple times.
- Look for explosive movement: Strong zones feature fast, sharp departures leaving the base consolidation area.